Guest Memories Timeline Instructions
Here's how your guests will share memories throughout the day — and how you'll see them all gathered in one place.
If you experience any issues, please contact us at events@smbooths.ca.
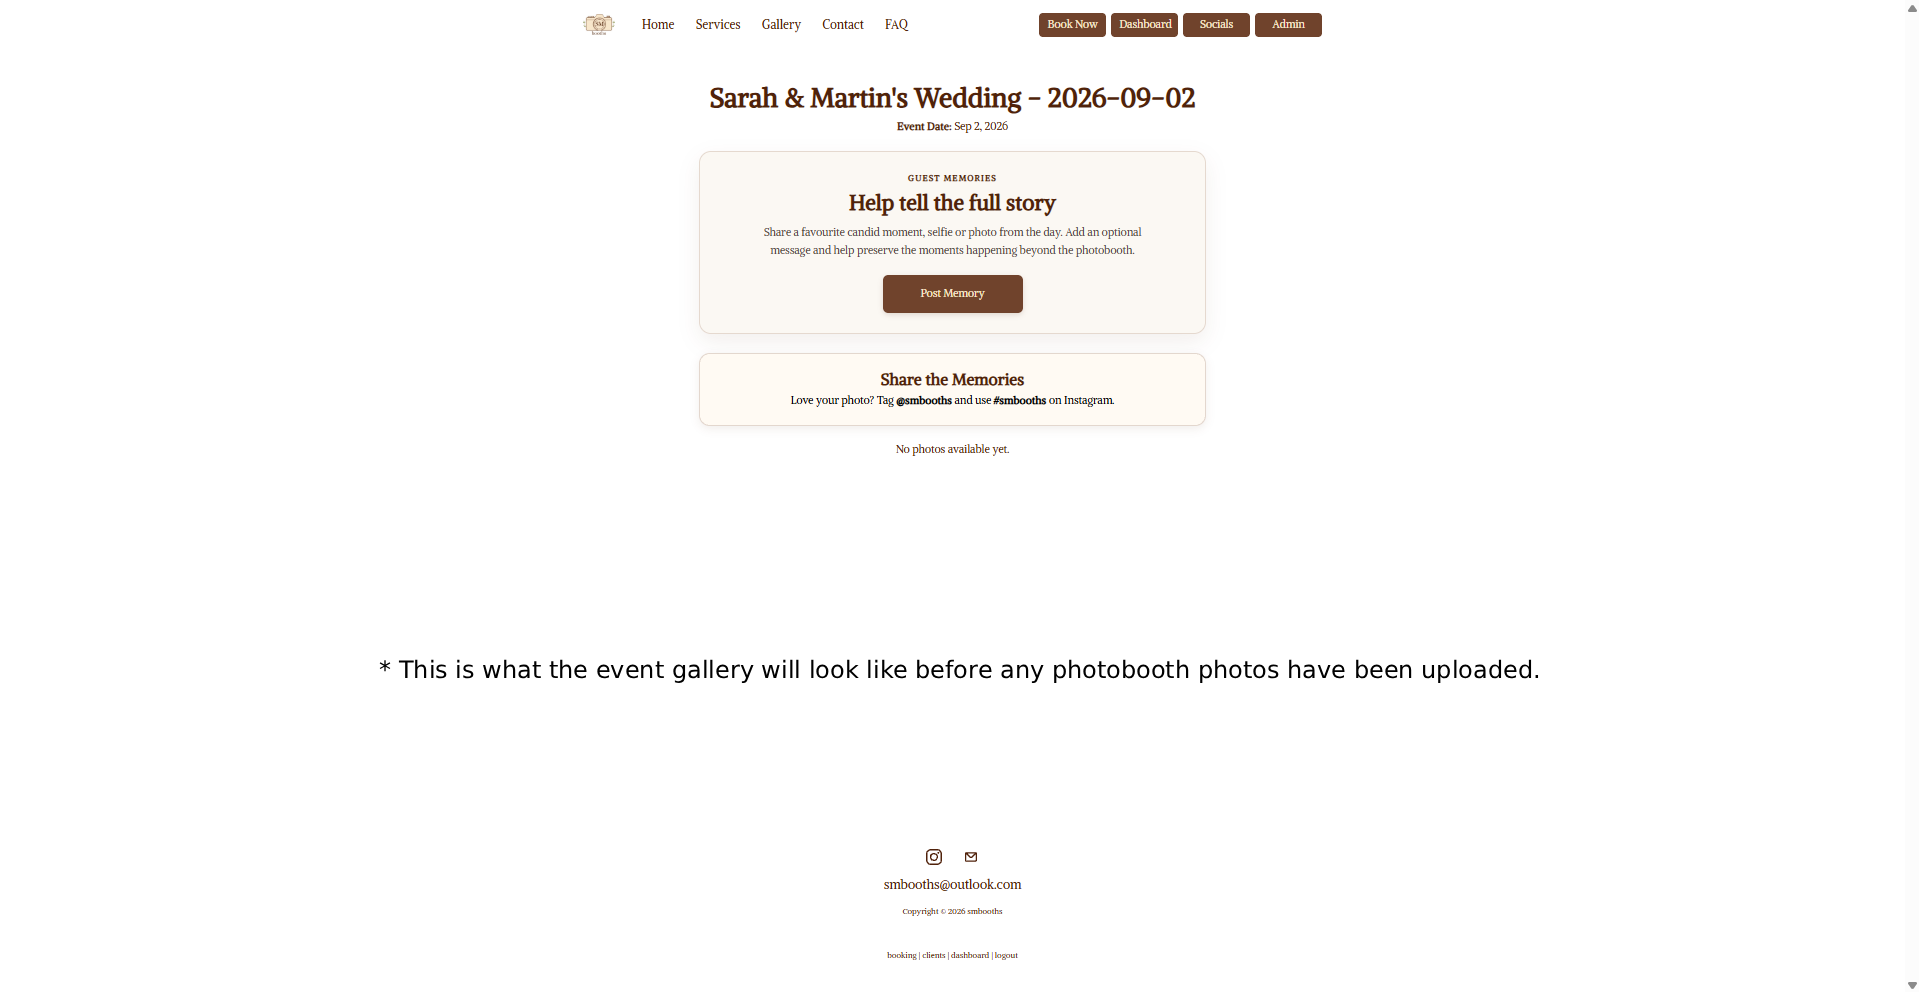
First, guests find the Guest Memories card
There are a couple of easy ways in — guests can scan the QR code on the photobooth screen at the event, or use the link we sent you in your well wishes email (feel free to pass that along to your guests too!). Here's what the gallery looks like before any photobooth photos have gone up, with the Post Memory button waiting at the top.
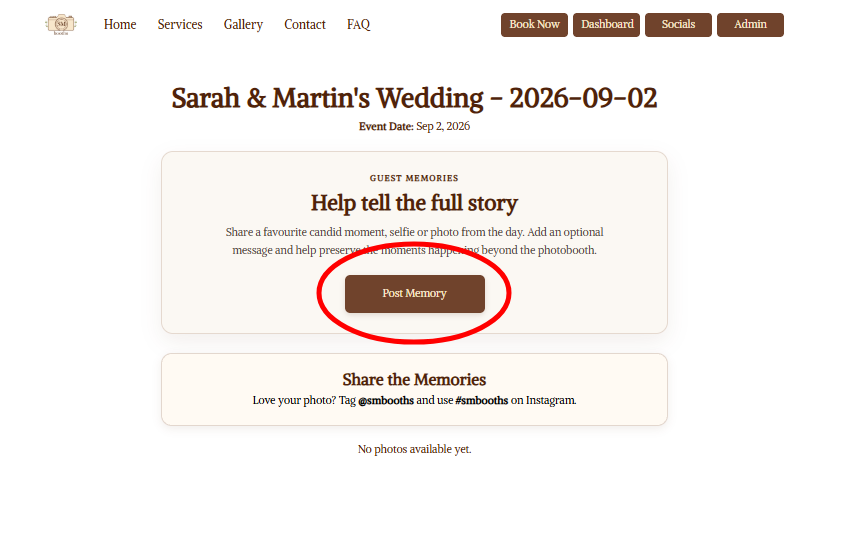
Next, they tap Post Memory
From there, it's easy — guests just tap Post Memory to share a candid photo, a selfie, or a favourite moment from the celebration, capturing all the little things happening just beyond the photobooth.
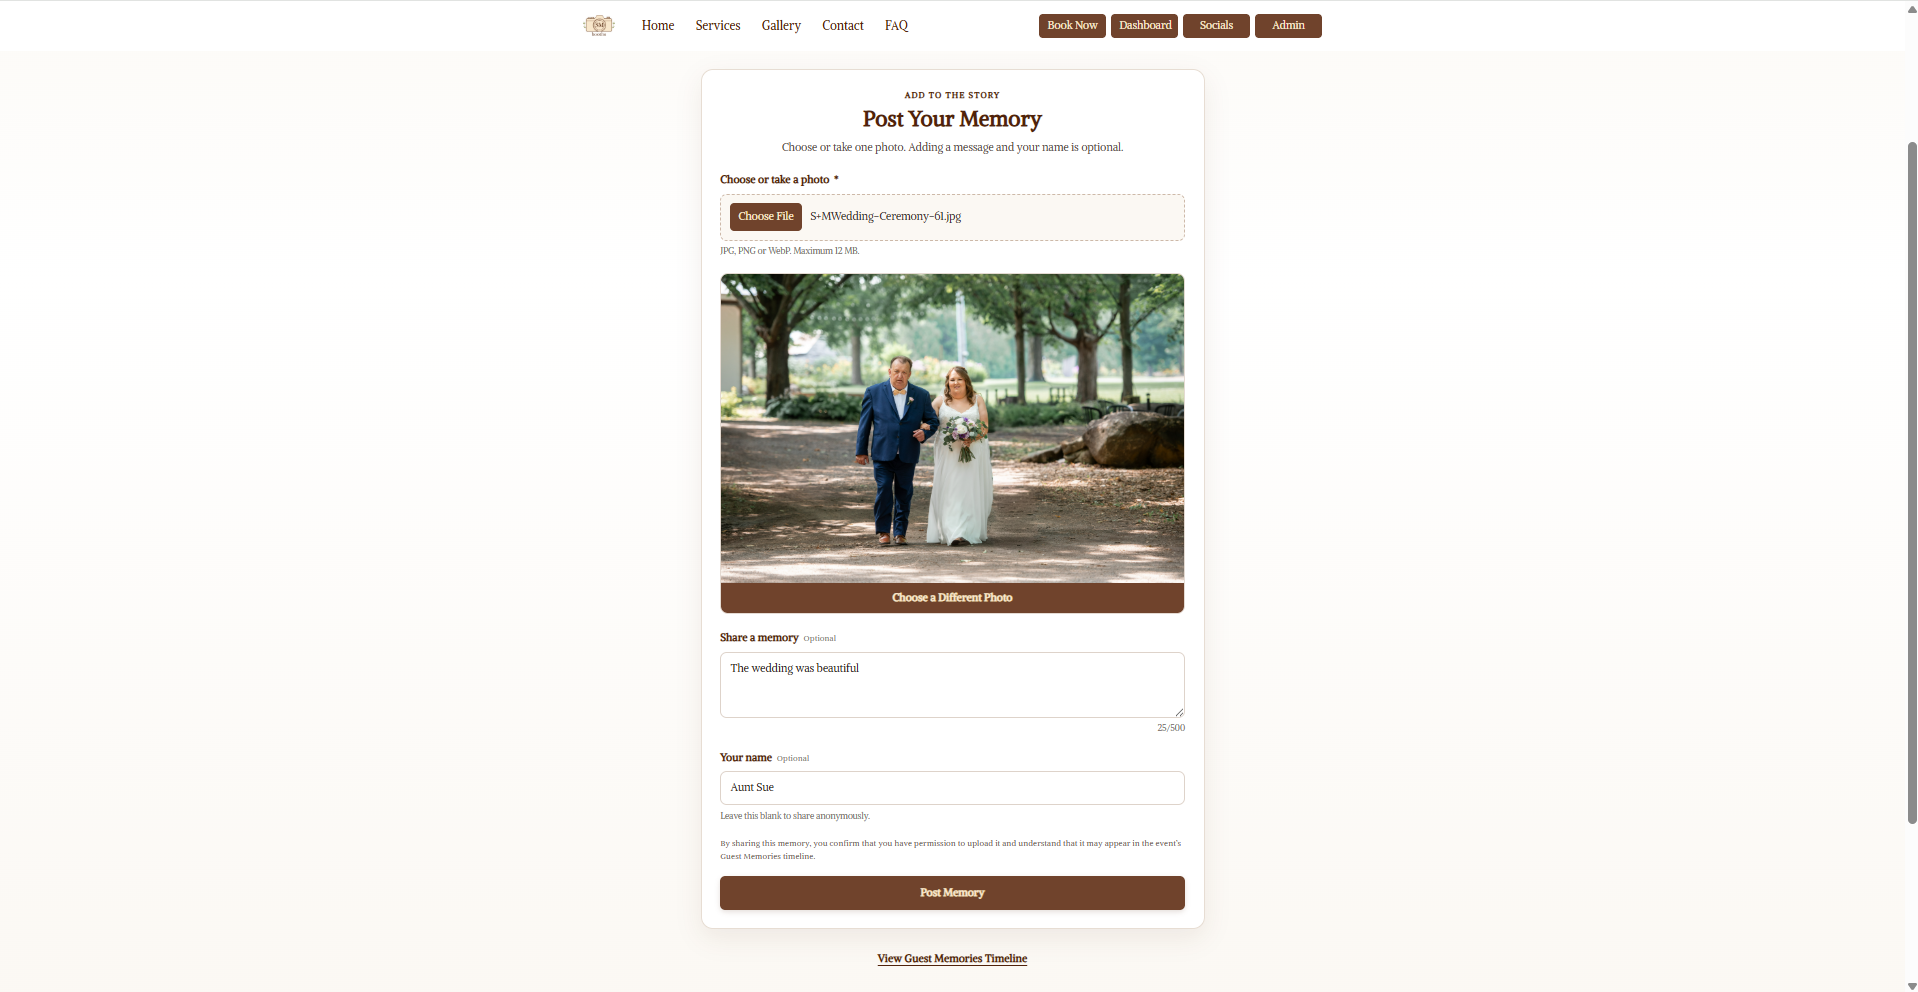
They snap or upload a photo
They can pick a photo from their phone or take one on the spot. A short message and their name are totally optional — then a tap on Post Memory and it's added to the story.
Then the timeline opens up
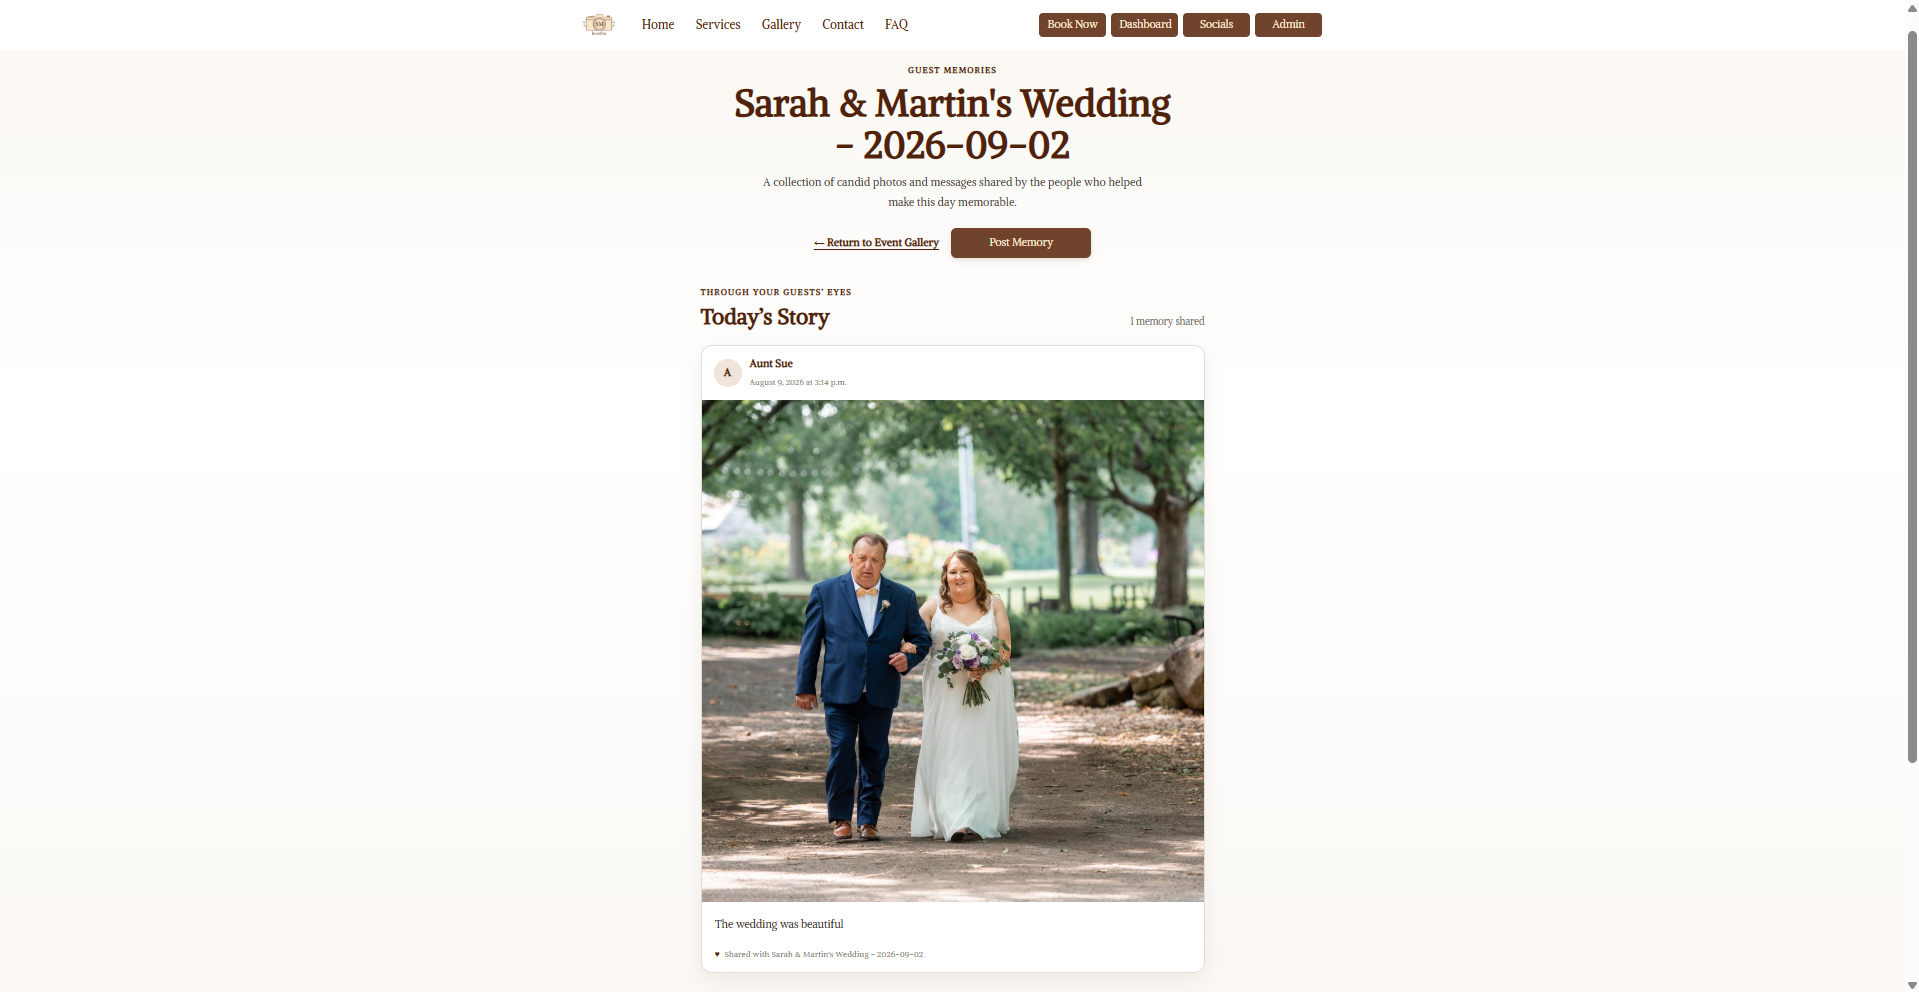
Once someone's shared their first memory, a View Memories Timeline button pops up right alongside Post Memory on the gallery page. One tap pulls up every candid photo and message guests have shared so far.
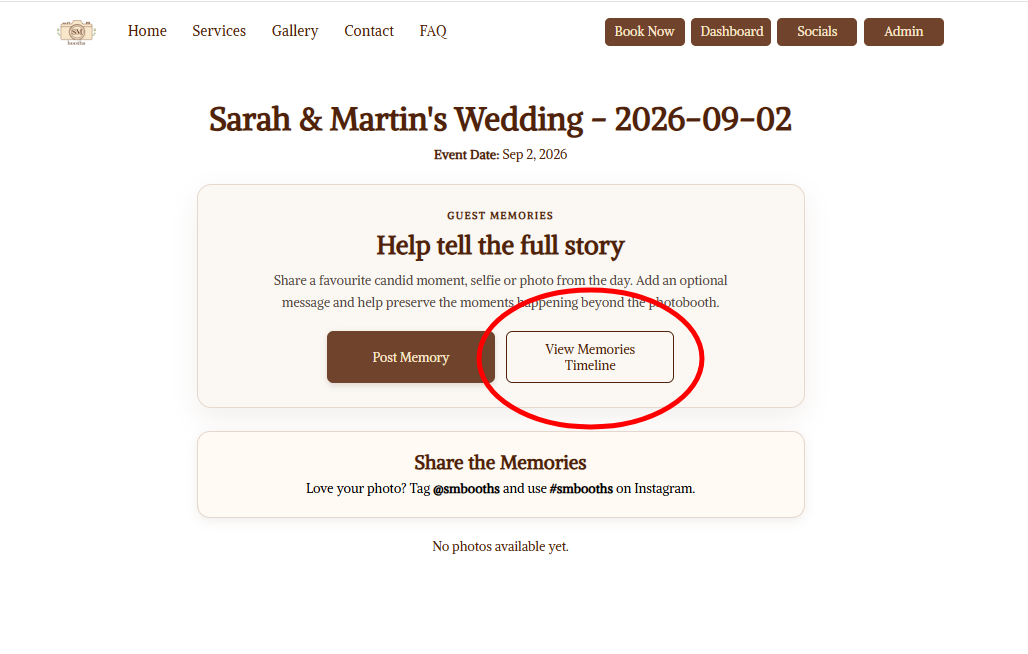
And you relive the day, through your guests' eyes
The timeline brings together everything guests shared into one place you can both enjoy — all those moments happening just beyond the photobooth. Guests can keep adding to it throughout the event, and afterward, you'll get to relive it all over again.